E-Paper Calendar V2: Lighting Up the Display
This article is migrated from Medium and translated by Gemini pro 2.5.
(This article was produced by GPT.)
After a long week of preparation and environment setup, I’ve finally reached this stage—porting the driver to the ESP32-S3 and trying to light up the e-paper display. This step marks the official transition of the V2 calendar project from concept to implementation. It also means all the subsequent features can now be built upon this.
I pre-organized the demo code provided by Waveshare, porting the initialization process line-by-line into my own framework. Everything seemed to be going smoothly until I called epd_init(), and it… got stuck.
To be precise, it was stuck waiting for the busy pin:
1
2
3
epd_cmd(0x04);       // Power ON
DELAY_MS(100);
epd_wait_until_idle();  // ← Stuck here
Stuck on the Busy Pin
At first, I suspected my SPI settings were wrong. I switched to a different set of GPIO pins, adjusted the frequency, and even followed the official implementation to simulate SPI using GPIO bit-banging. I even suspected an issue with the SPI host initialization, so I ditched the HAL interface and used the most primitive data sending methods to check if the logic was consistent.
It was still stuck, waiting for busy == 0.
I even pulled out my oscilloscope to check the signals. Logically, the MOSI and CLK waveforms looked almost identical to the Raspberry Pi demo.
At this point, a doubt started to creep in: What if the display itself is broken?
I took out the Raspberry Pi board I used for testing, re-flashed the official demo program, and… the screen worked perfectly.
And this was the same screen I had just dropped on the floor. It now has a few new gray shadows on it, but the image still appears.
I went back and compared the ESP32 and Raspberry Pi driver logic. They were almost identical. I had even copied the delay times directly from the manufacturer’s initialization program:
1
2
3
4
5
6
7
8
9
static void EPD_Reset(void)
{
    DEV_Digital_Write(EPD_RST_PIN, 1);
    DEV_Delay_ms(20);
    DEV_Digital_Write(EPD_RST_PIN, 0);
    DEV_Delay_ms(2);
    DEV_Digital_Write(EPD_RST_PIN, 1);
    DEV_Delay_ms(20);
}
I wrote it exactly like this, without changing the timings, but it just kept getting stuck.
Finally, in a “last-ditch effort” move, I took GPT’s advice and arbitrarily changed the reset’s “low” time to 200ms and tried again.
And the screen started working.
Testing Images and Mandarin Characters
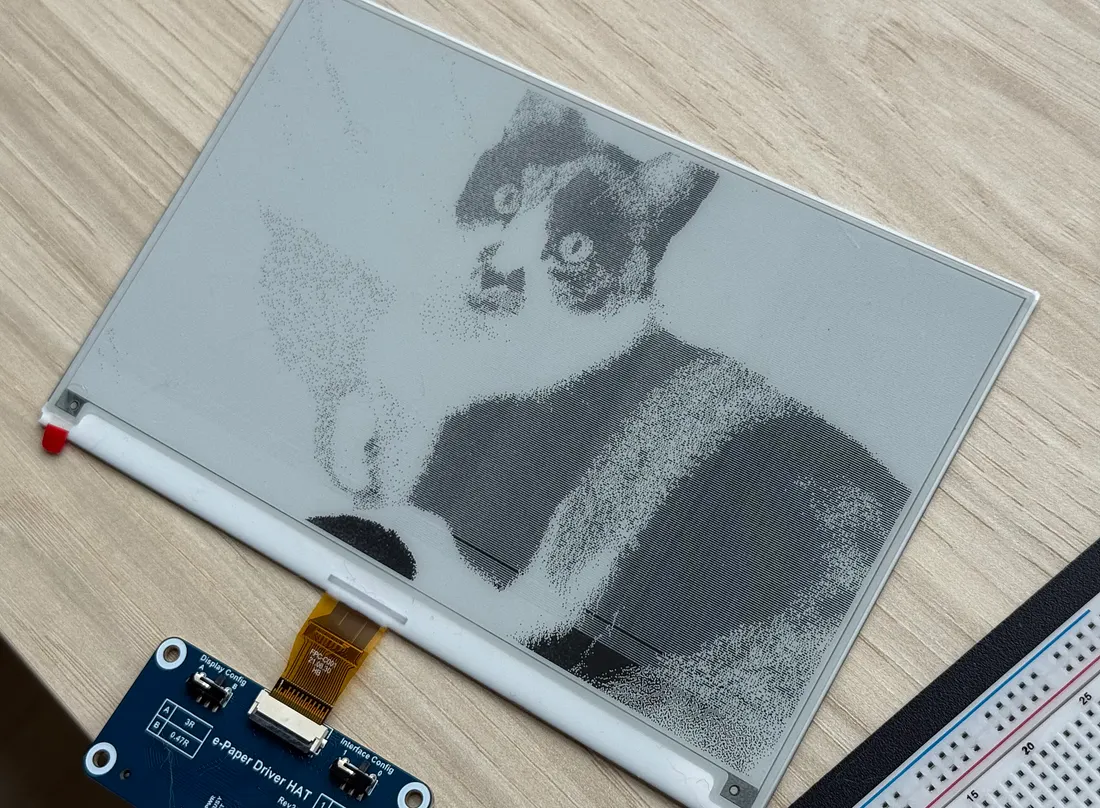
After that, I grabbed a random image, converted it to an 800x480 monochrome bitmap (really just a 1-bit raw bit-array) using Python, and tried displaying it. The first time I drew it, the entire image was inverted. I then realized the manufacturer’s display function does a bit-flip internally and requires sending the data a second time. I added that logic, and it displayed normally.
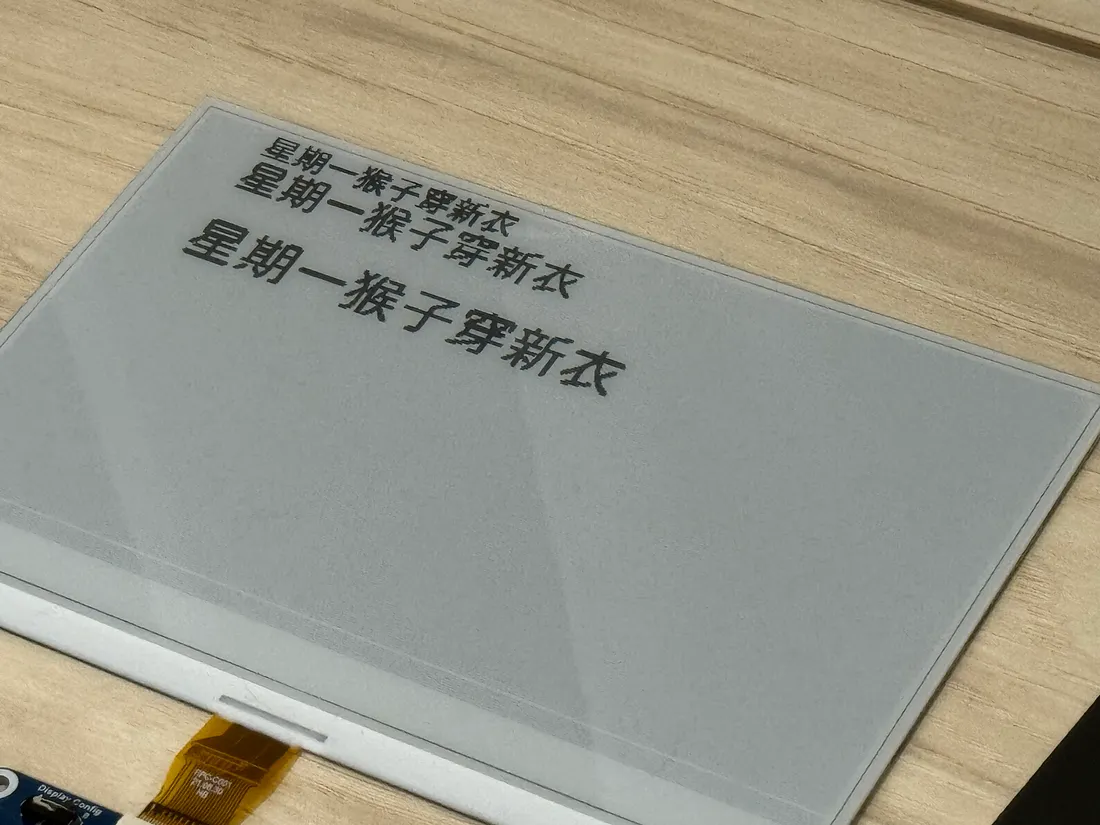
Next, I tested the feature I was most worried about: rendering Mandarin (Chinese) fonts.
Using LVGL + TinyTTF, I successfully loaded a font subset extracted by pyftsubset and printed Mandarin characters on the screen. This means the two biggest risks—”Will the driver communication work?” and “Can I draw Mandarin fonts?”—have both been eliminated.
Explaining the Process Behind This
To handle Mandarin fonts on the resource-constrained ESP32, you first have to clarify the memory allocation and characteristics:
- Declaring
unsigned charvariables: These are stored in SRAM (DRAM). This space is at most 320KB. If you try to stuff an entire TTF font file in here, it will explode. - Adding the
constkeyword: The compiler will place this data in flash. This space can be 16-32MB, which is far more generous than SRAM. - Using
malloc()(dynamic allocation): This will primarily allocate from PSRAM (if enabled). This space is typically 8MB, also much larger than SRAM, and its read speed is faster than flash. It’s a potential source for loading fonts from an SD card later.
The entire font handling workflow is as follows:
- Grab all used Mandarin characters from the ICS file, create a common character dictionary (
.txt). - Use the
pyftsubsettool (from thefonttoolspackage) to create a subset font from the original TTF based on this dictionary. - Use
xxdto convert this into a.cfile (a C array), allowing TinyTTF to load it directly. - The rest is handled by LVGL’s
lv_tiny_ttf_create_data()to parse the font and render it.
The whole process is controllable and makes it easy to switch out different font subsets in the future.
Watchdog Triggering Frequently
Although the font display test was successful, the Watchdog Timer (WDT) triggered almost every time during the rendering process.
The solution I chose was to extend the Watchdog’s time threshold. During this period, the system is genuinely busy performing font rendering computations; it’s not stuck or out of control. Therefore, adjusting the tolerance threshold is a reasonable approach.
This also serves as a reminder that if the amount of text on the screen increases, the overall render time will continue to rise. In the future, I may need to add time-tracking to the render operation, break it into batches, or even consider a more efficient font-handling solution.
But for now, this setting is sufficient to support the V1 display.
Next Steps
Next, I will move on to the Calendar Data Parsing phase.
This is the only part I haven’t successfully implemented on the ESP32 yet. The original Raspberry Pi version used Python to process .ics files. The ESP32 has no readily available parsing tools. I either have to write my own parser or convert it to an intermediate format and have a server feed the data.
I’ll start by comparing these two solutions, considering the convenience of user updates and system extensibility.
To be continued.